Configure auto-exposures beta
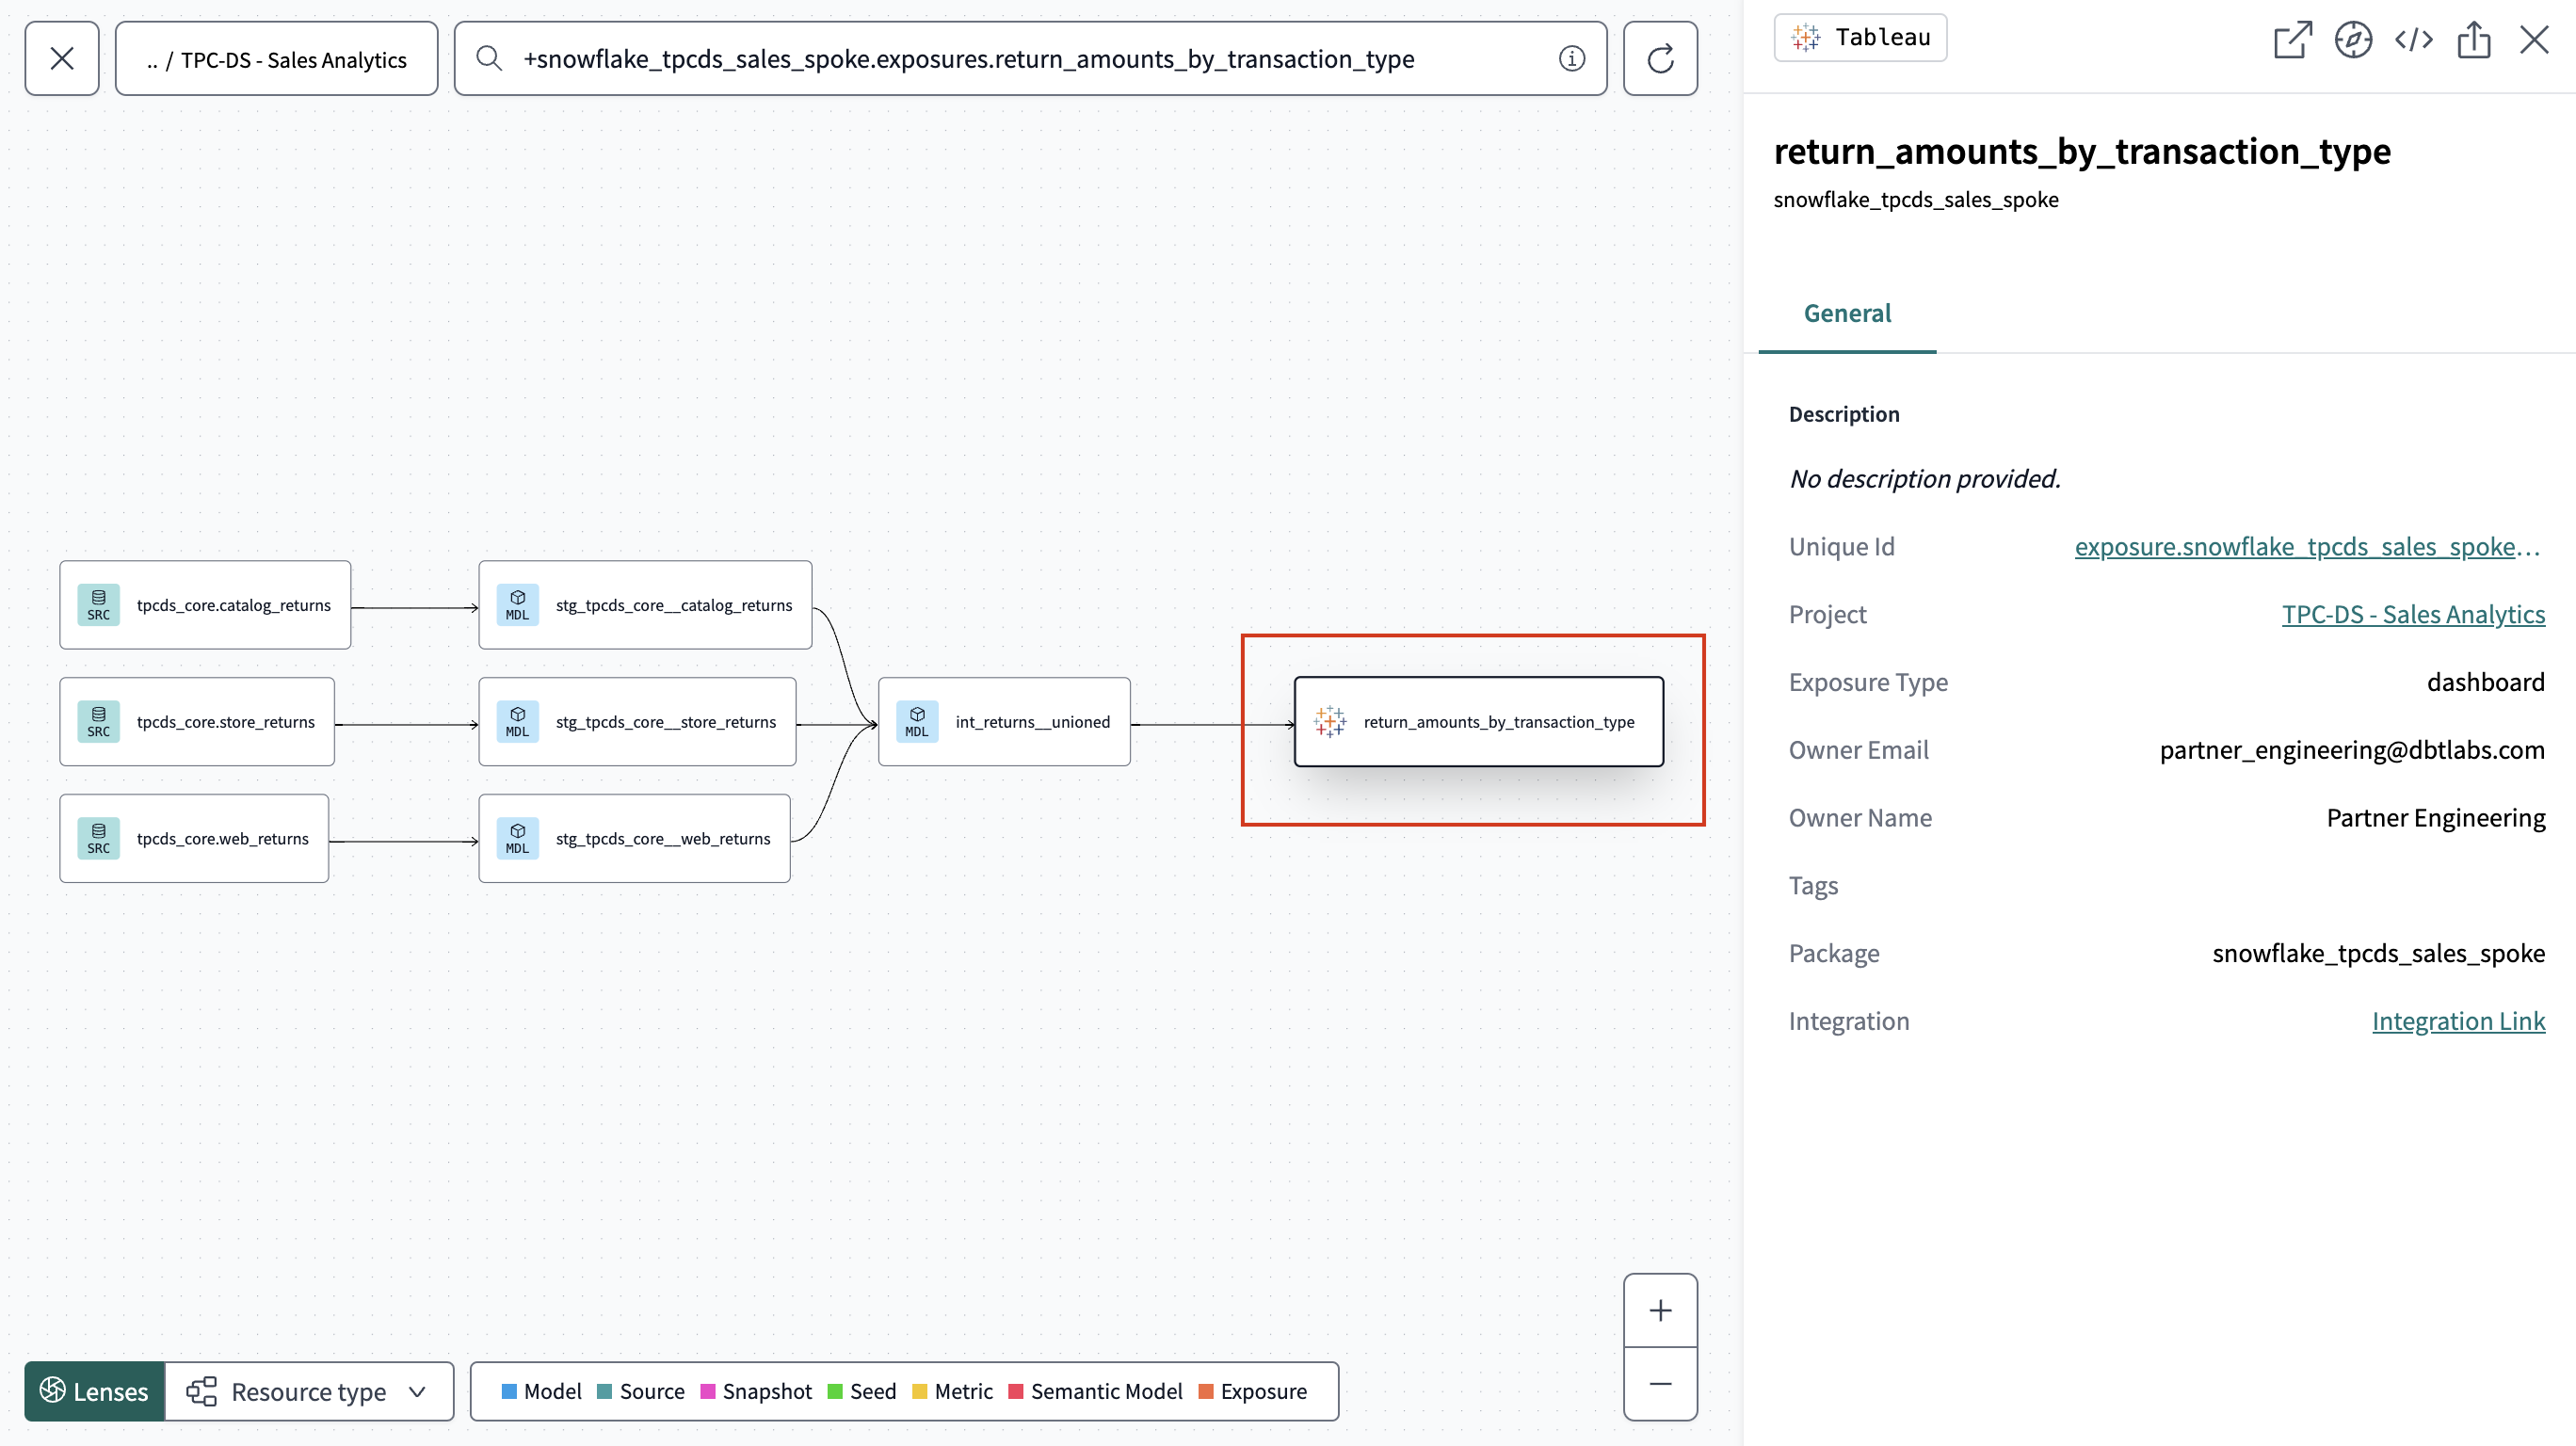
As a data team, it’s critical that you have context into the downstream use cases and users of your data products. Auto-exposures integrates natively with Tableau and auto-generates downstream lineage in dbt Explorer for a richer experience.
Auto-exposures are currently available in beta to a limited group of users and are gradually being rolled out. If you're interested in gaining access or learning more, stay tuned for updates!
Auto-exposures help data teams optimize their efficiency and ensure data quality by:
- Helping users understand how their models are used in downstream analytics tools to inform investments and reduce incidents — ultimately building trust and confidence in data products.
- Importing and auto-generating exposures based on Tableau dashboards, with user-defined curation.
- Enabling the active exposure work to run models based on when exposures are updated or need to be updated, improving timeliness and reducing costs.
Prerequisites
To access the features, you should meet the following:
- You have a dbt Cloud account on the Enterprise plan.
- You have set up a production deployment environment for each project you want to explore, with at least one successful job run.
- You have admin permissions in dbt Cloud to edit project settings or production environment settings
- Use Tableau as your BI tool and can enable metadata permissions or work with an admin to do so. Compatible with Tableau Cloud or Tableau Server with the Metadata API enabled.
Set up in Tableau
This section of the document explains the steps you need to set up the auto-exposures integration with Tableau. Once you've set this up in Tableau and dbt Cloud, you can view the auto-exposures in dbt Explorer.
To set up personal access tokens (PATs) needed for auto exposures, ask a site admin to configure it for the account.
-
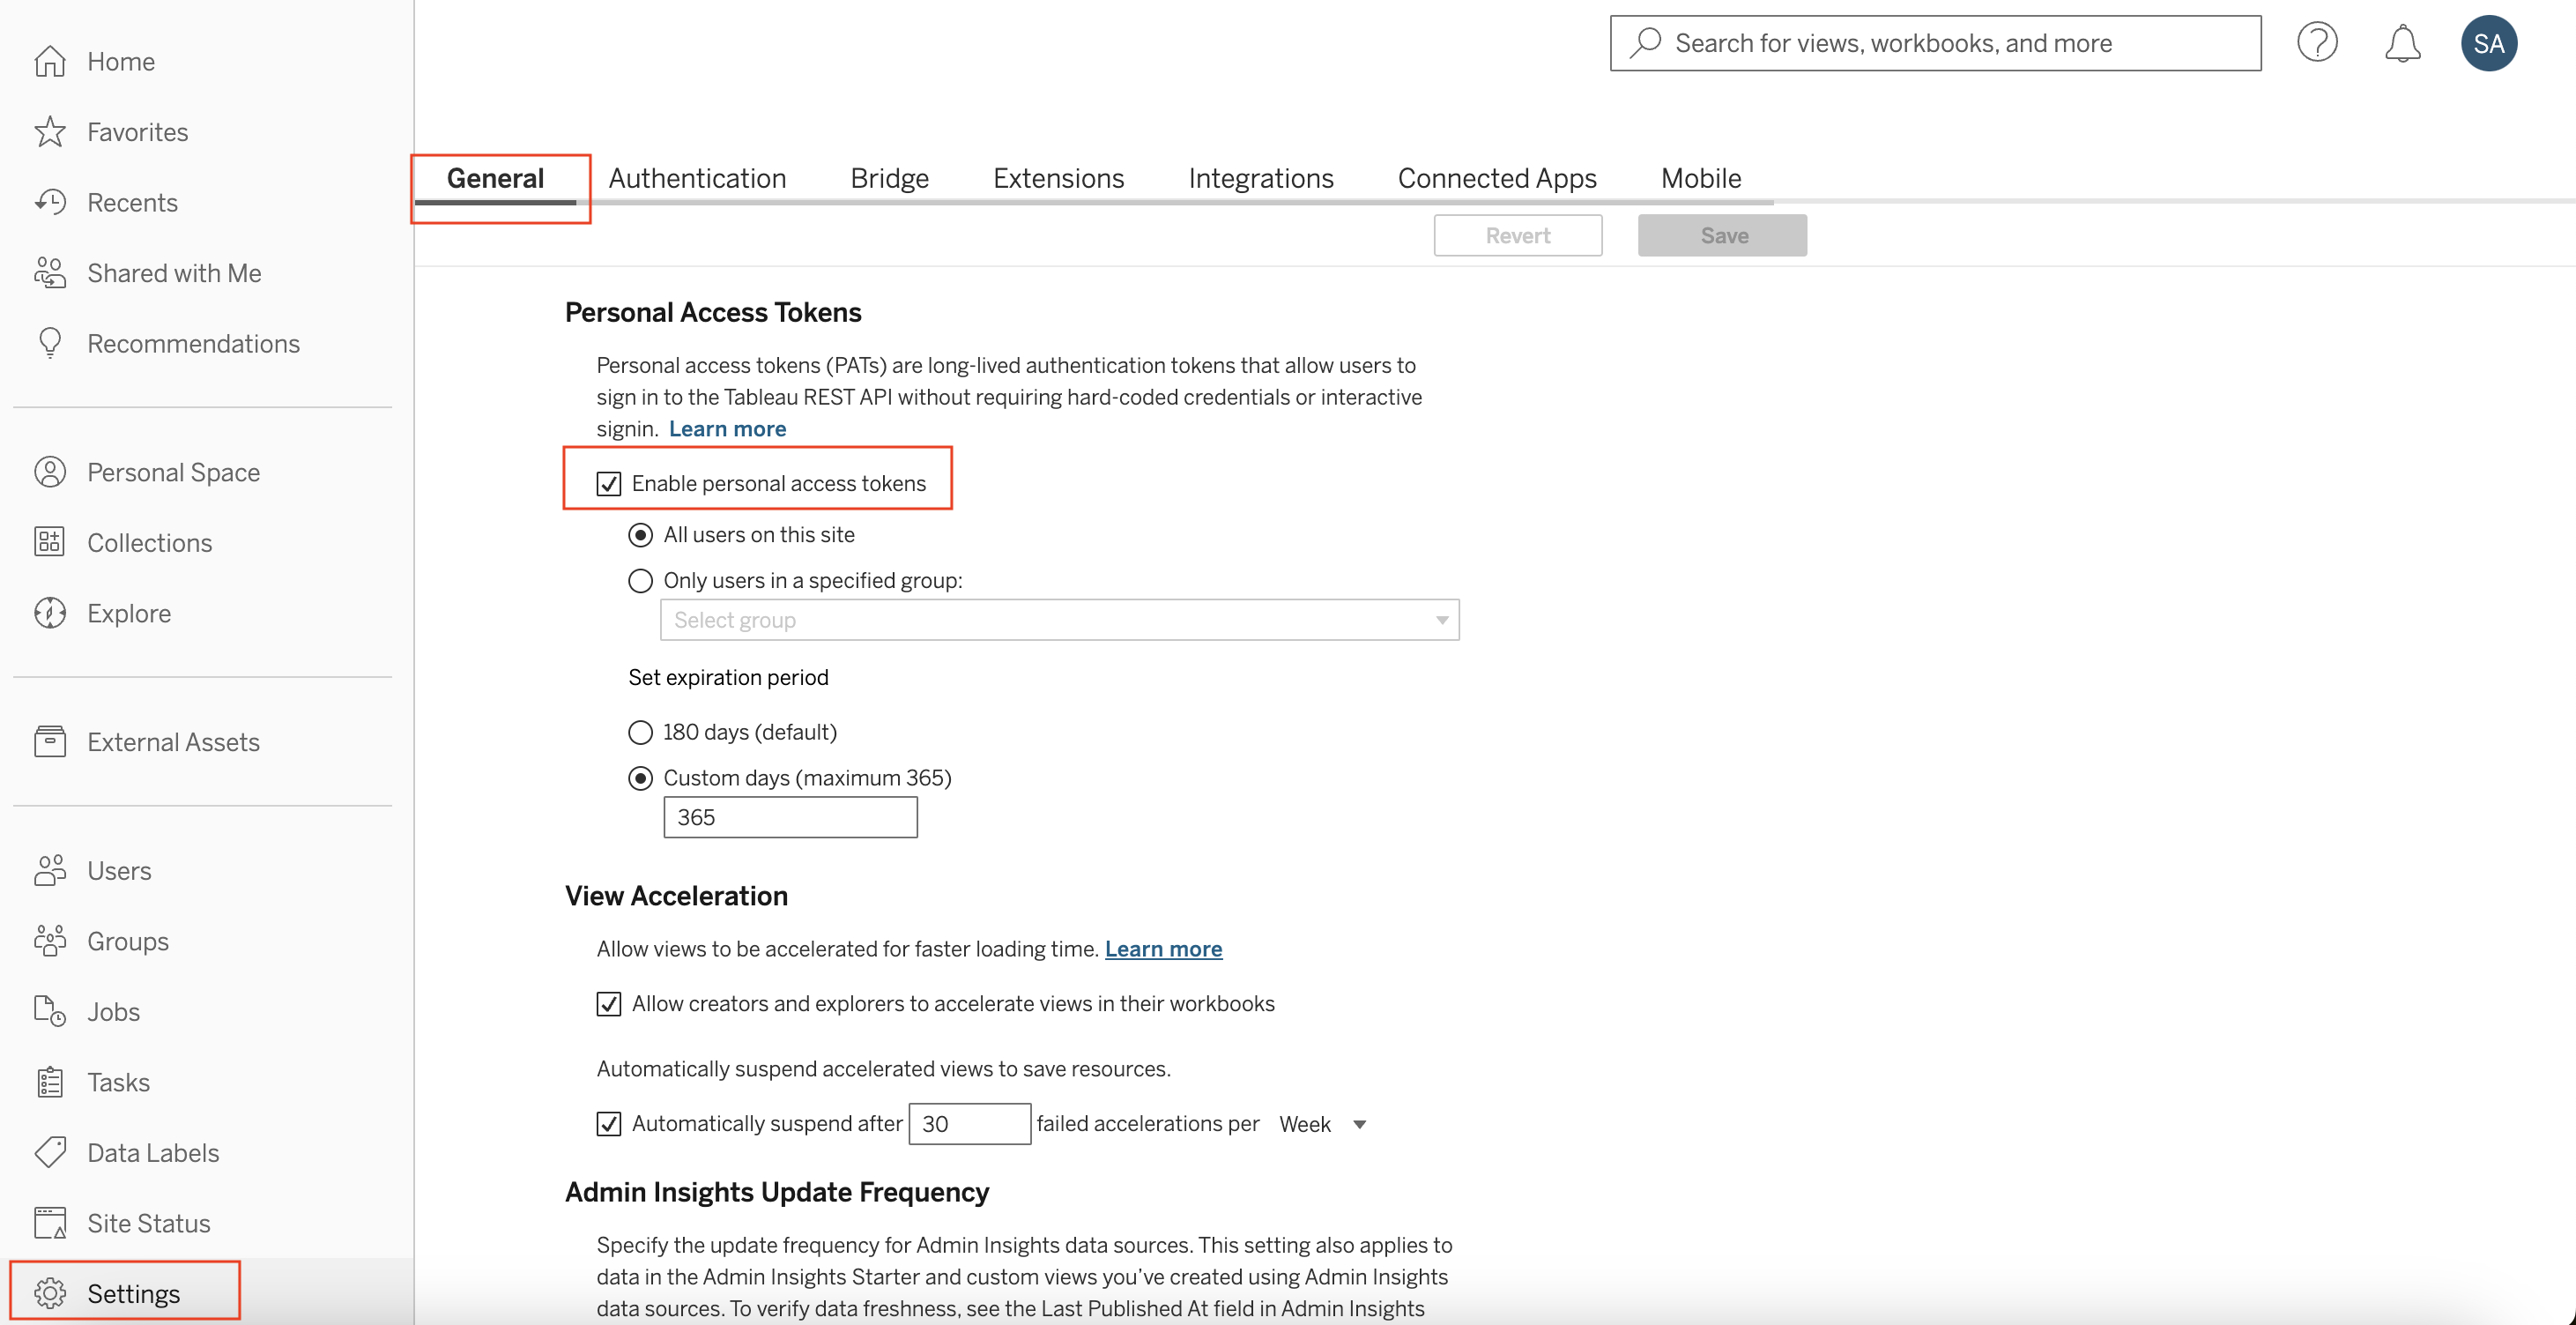
Ensure you or a site admin enables PATs for the account in Tableau.
-
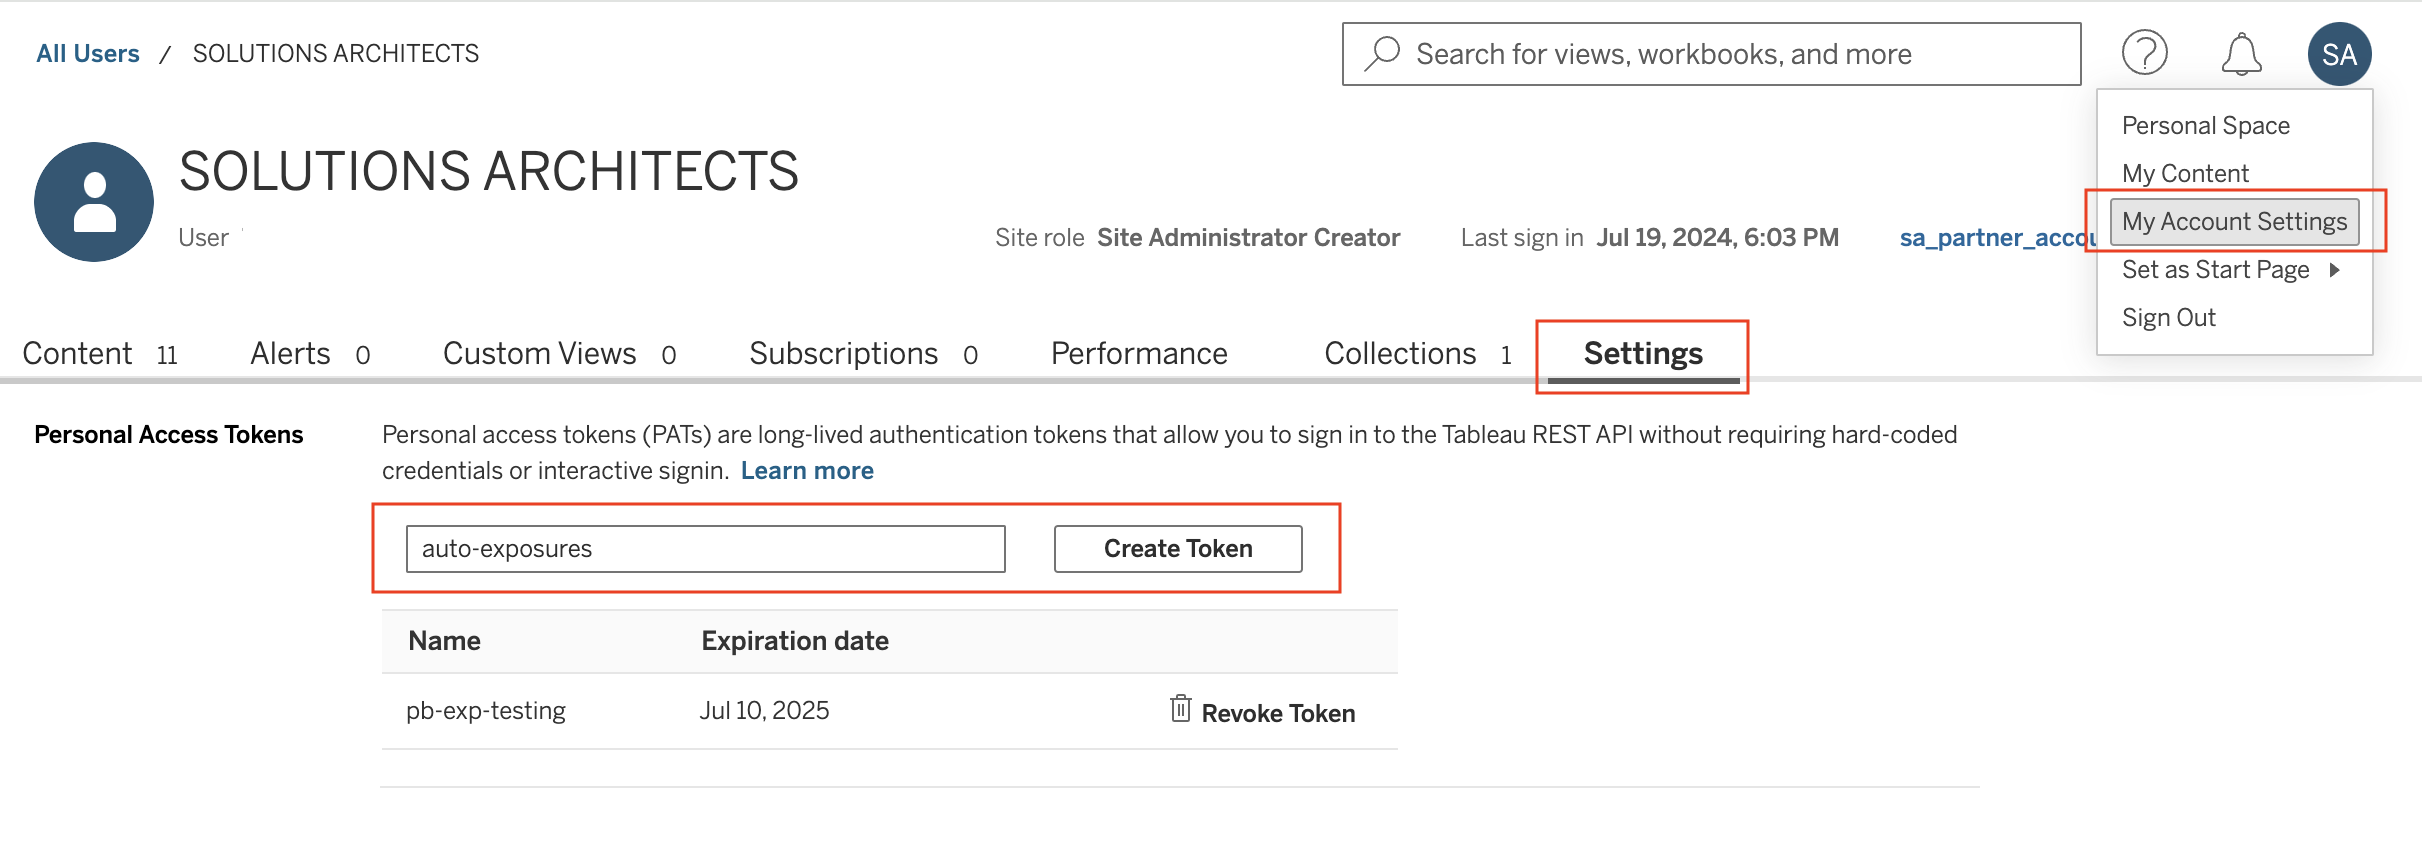
Create a PAT that you can add to dbt Cloud to pull in Tableau metadata for auto exposures.
-
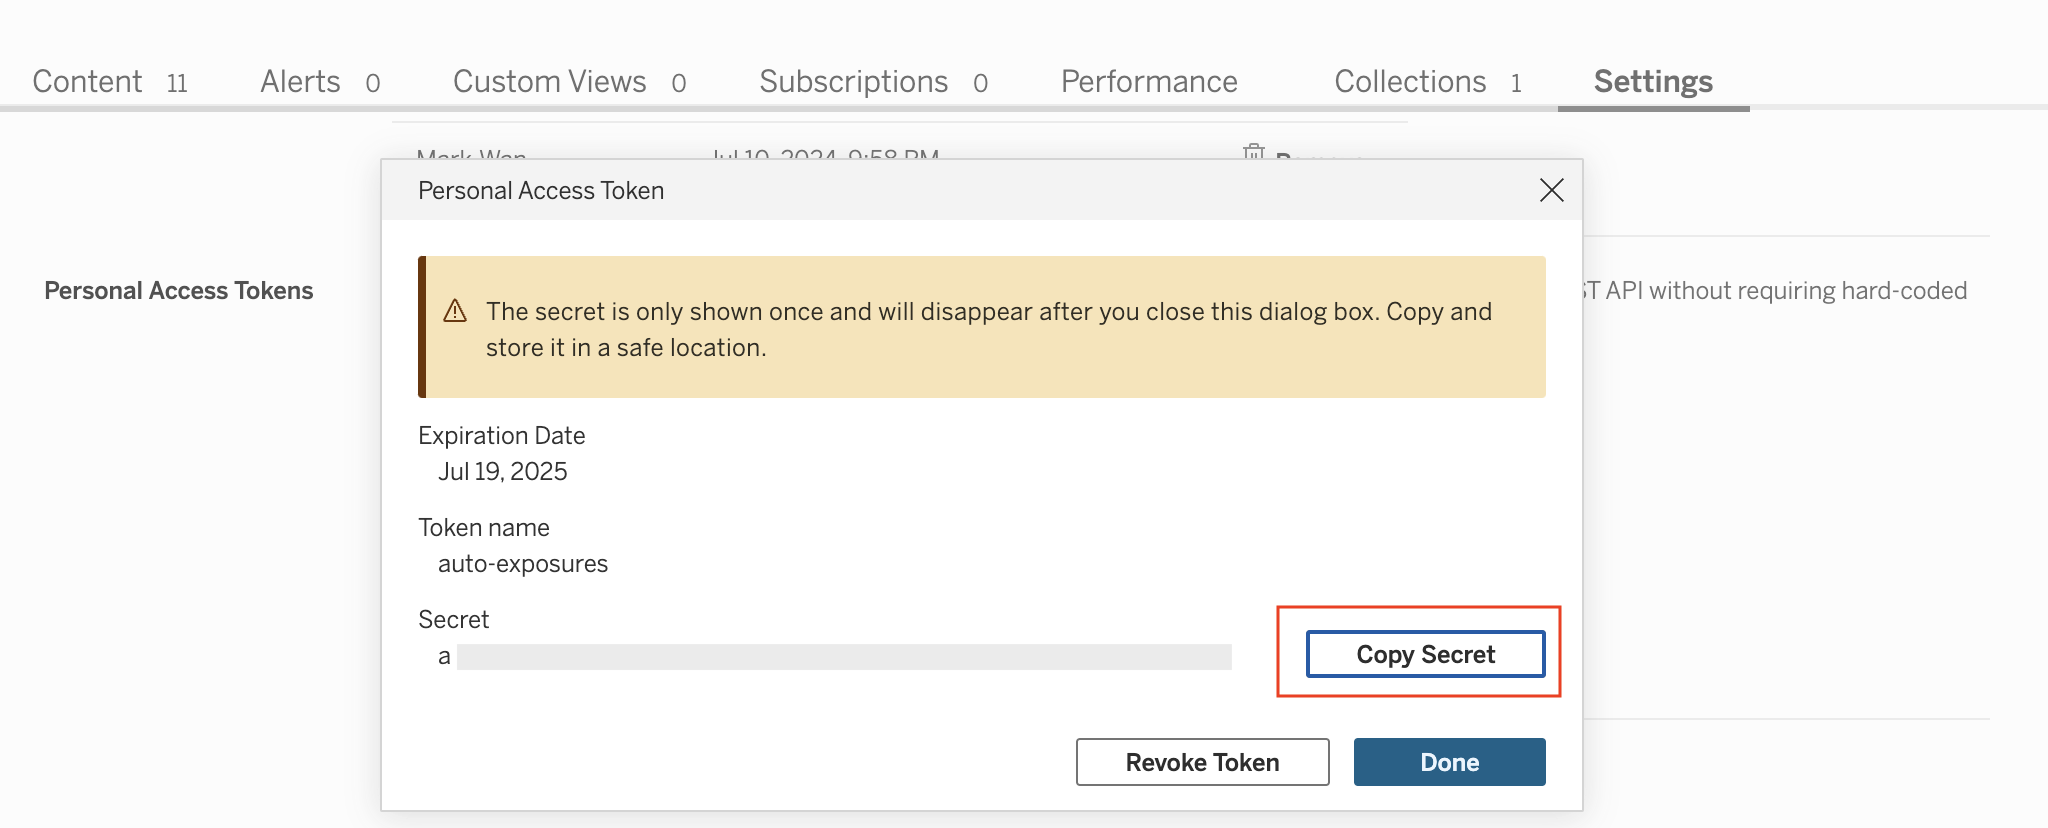
Copy the Secret and the Token name and enter them in dbt Cloud. The secret is only displayed once, so store it in a safe location (like a password manager).
-
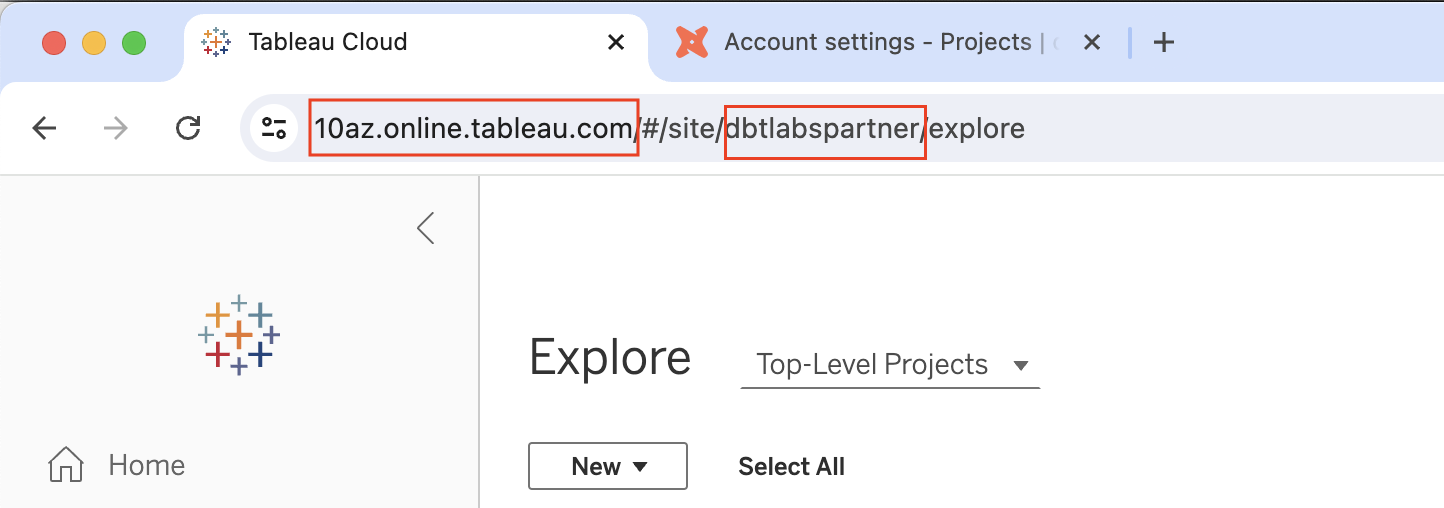
Copy the Server URL and Sitename. You can find these in the URL while logged into Tableau.
For example, if the full URL is:
10az.online.tableau.com/#/site/dbtlabspartner/explore:- The Server URL is the first part of the URL, in this case:
10az.online.tableau.com - The Sitename is right after the
sitein the URL, in this case:dbtlabspartner
- The Server URL is the first part of the URL, in this case:
-
You should now be ready to set up auto-exposures in dbt Cloud after copying the following items, which you'll need during the dbt Cloud setup: ServerURL, Sitename, Token name, and Secret.
Set up in dbt Cloud enterprise
-
In dbt Cloud, navigate to the project you want to add the auto-exposures to and then select Settings.
-
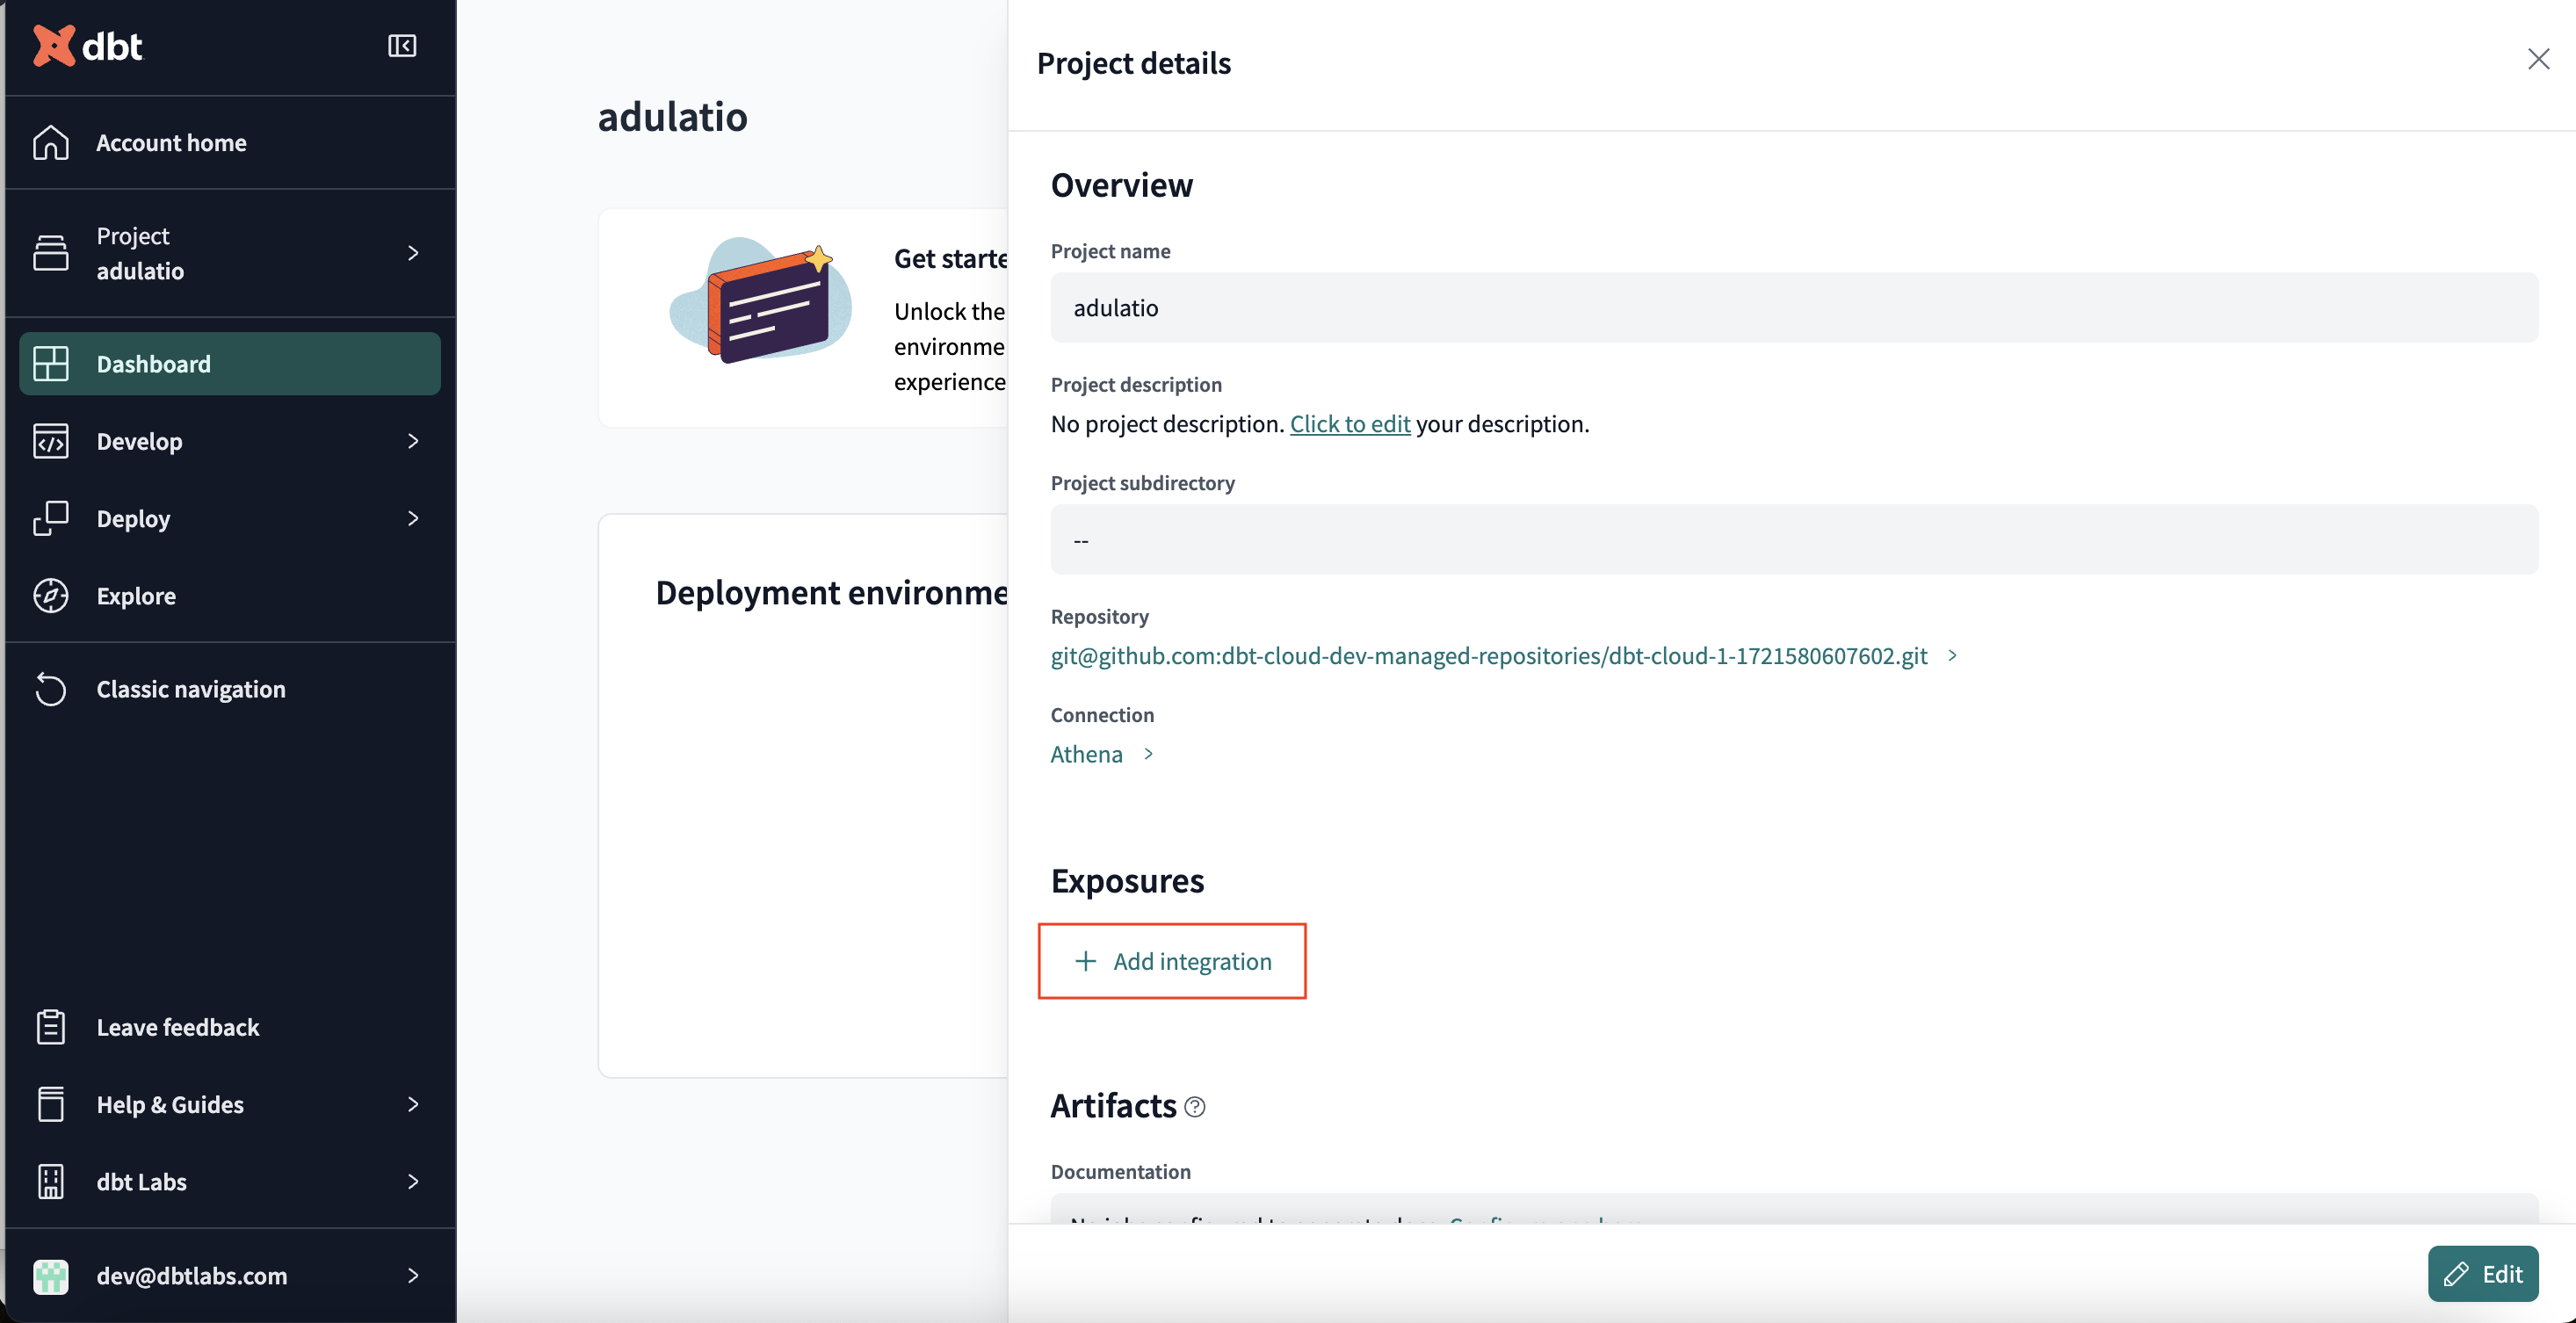
Under the Exposures section, select Add integration to add the Tableau connection.
-
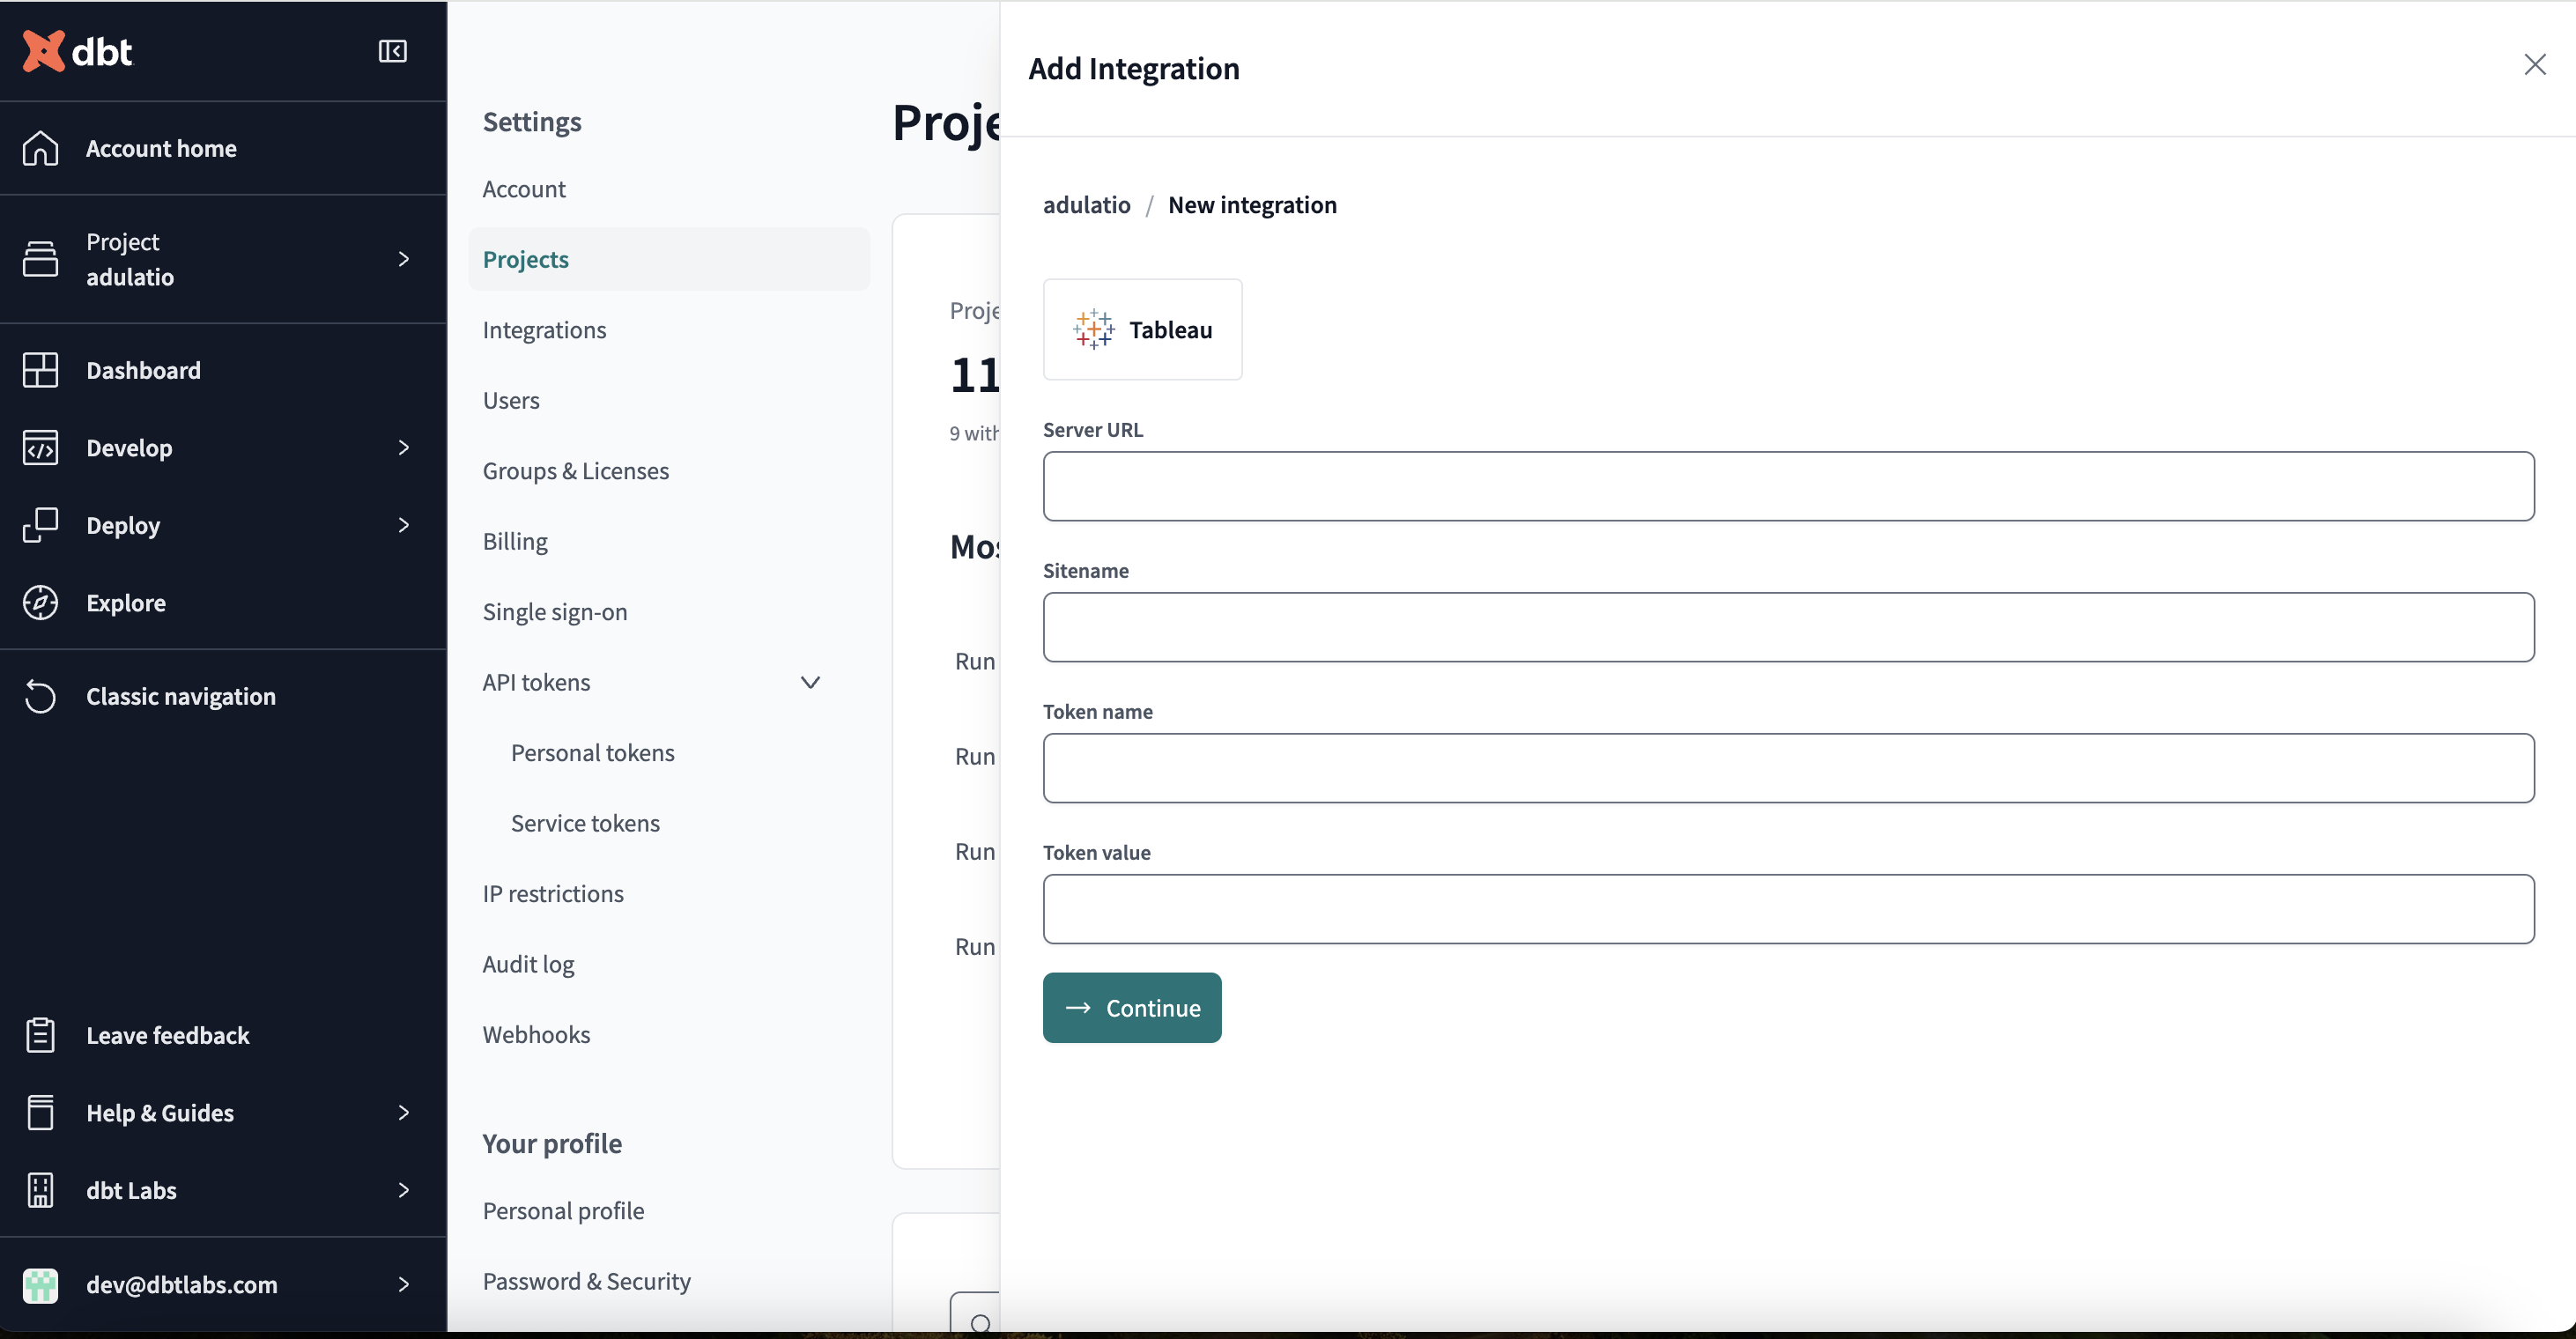
Enter the details for the exposure connection you collected from Tableau in the previous step and click Continue. Note that all fields are case-sensitive.
-
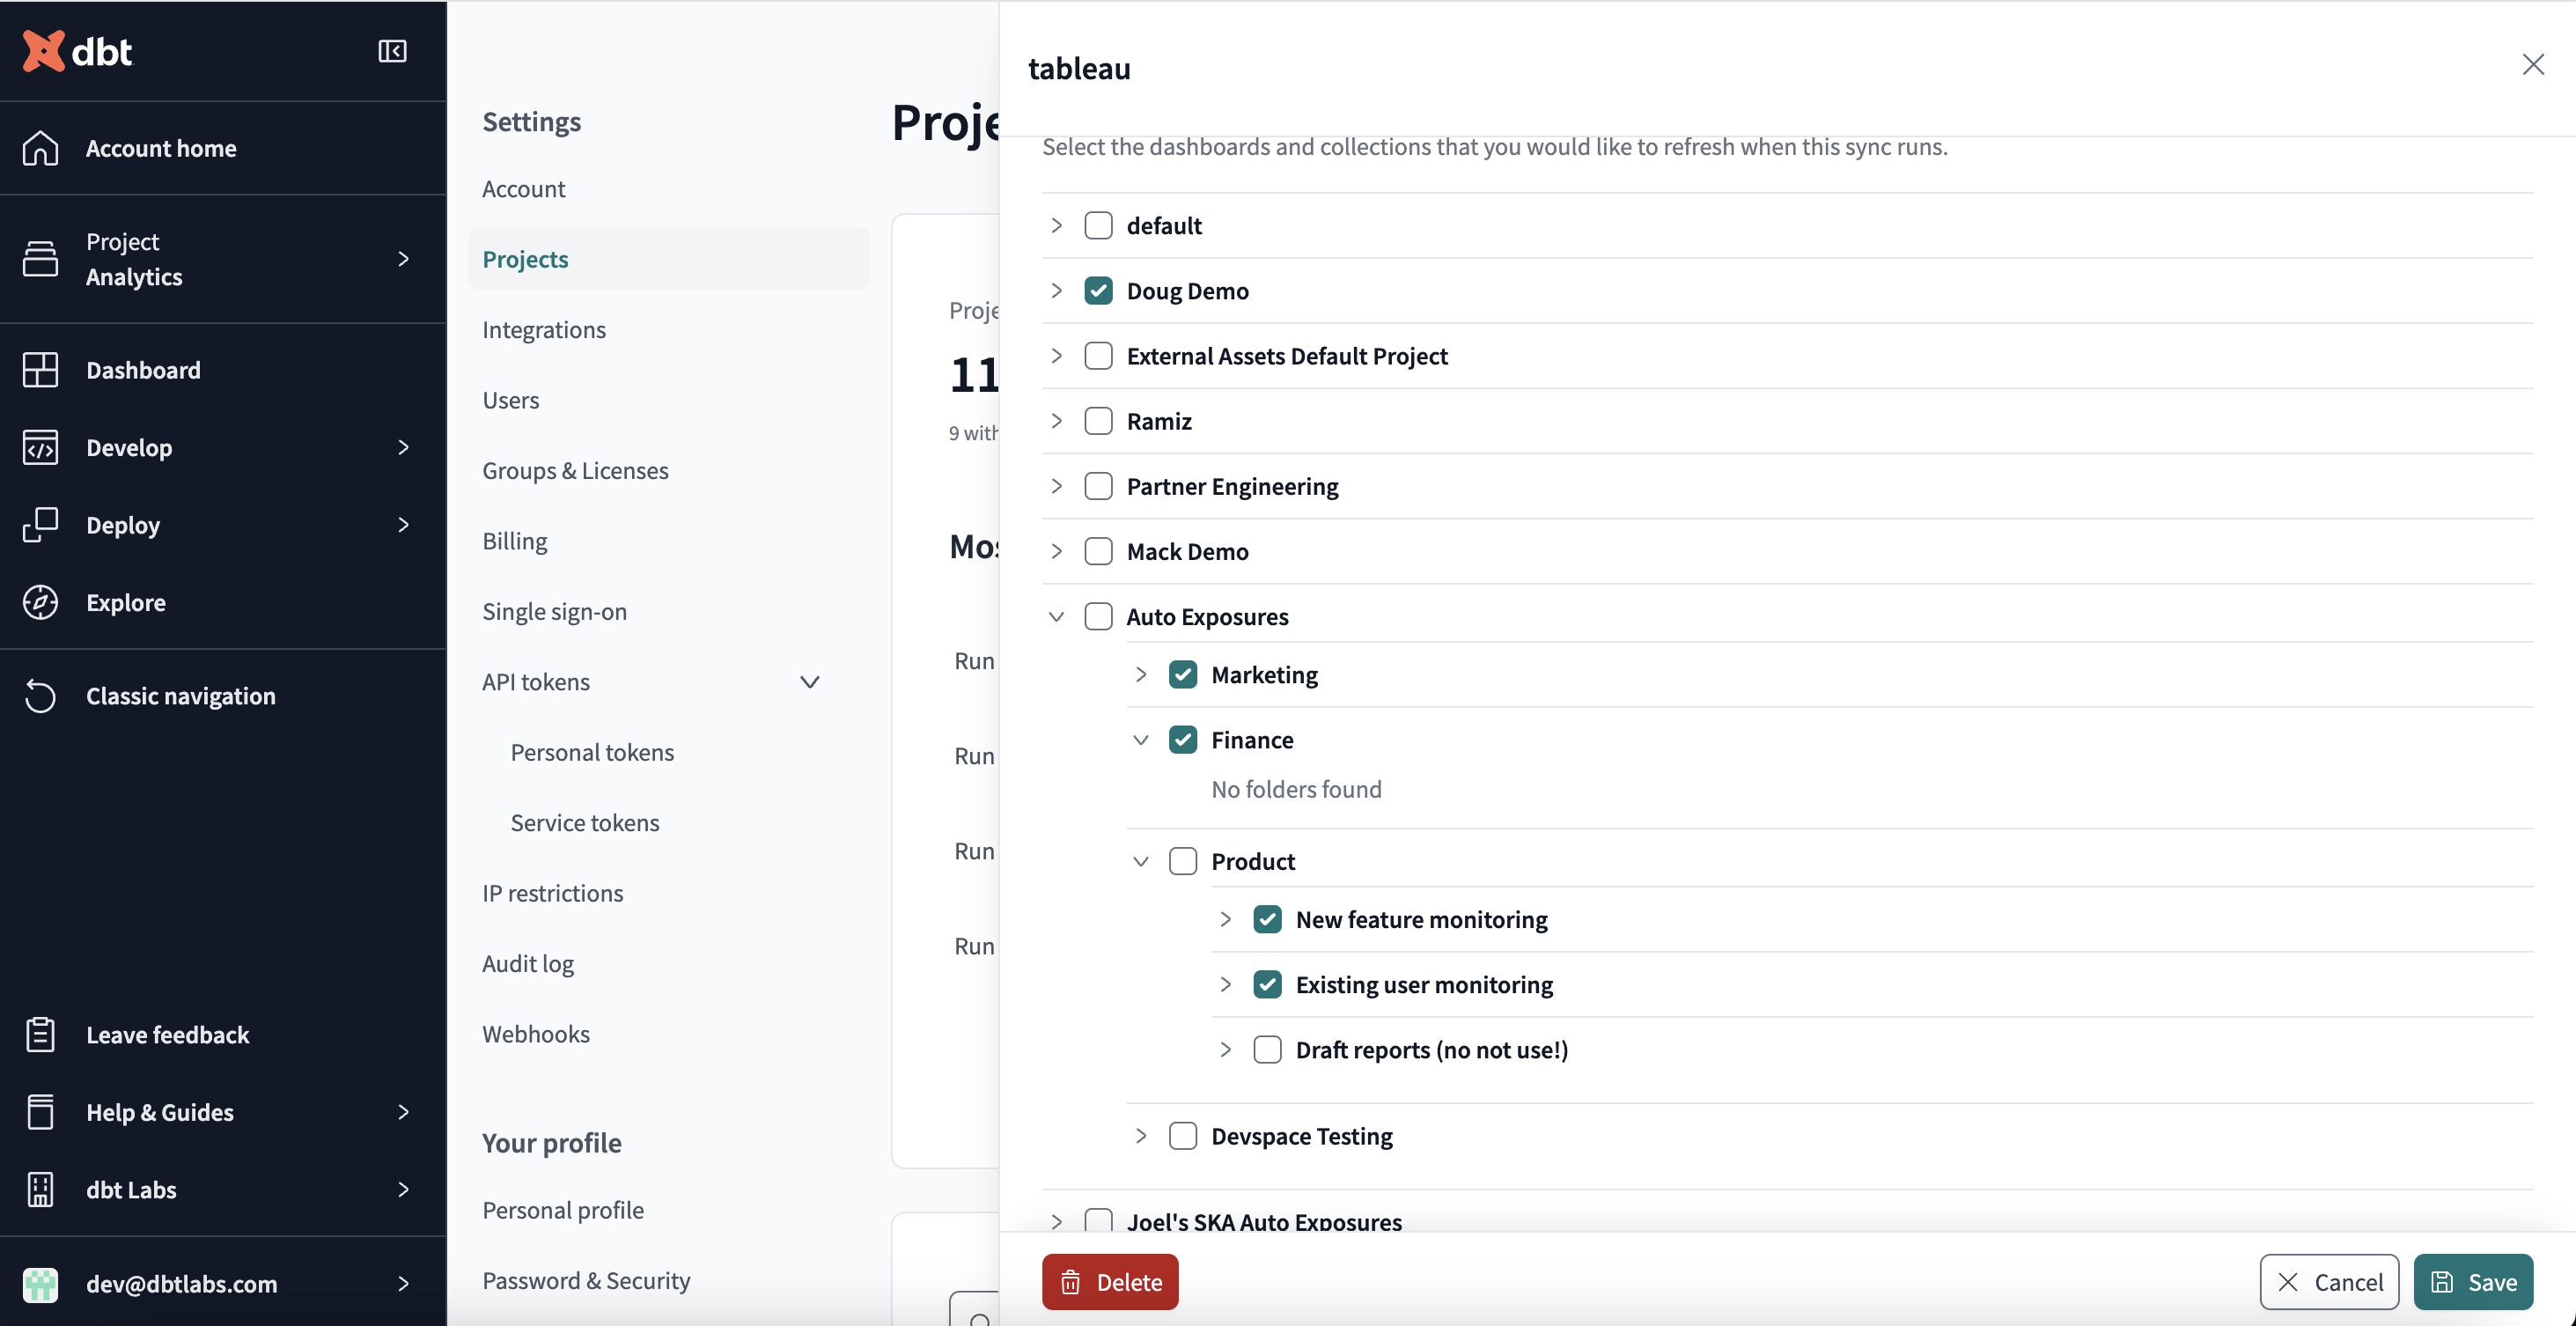
Select the collections you want to include for auto exposures.
dbt Cloud automatically imports and syncs any workbook within the selected collections. New additions to the collections will be added to the lineage in dbt Cloud during the next automatic sync (usually once per day).
-
Click Save. dbt Cloud imports everything in this collection and you can continue to view them in Explorer using the next steps.
For more information on how to view and use auto-exposures, refer to View auto-exposures from dbt Explorer page.
Refresh auto-exposures in jobs
Soon, you’ll also be able to use auto-exposures trigger refresh of the data used in your Tableau dashboards from within dbt Cloud. Stay tuned for more on this soon!
